Although our exhibition has had to be delayed due to Covid-19, one of the ideas that the group came up with, was for members who wished to participate, to make 2 shopping bags for the raffle/sale.
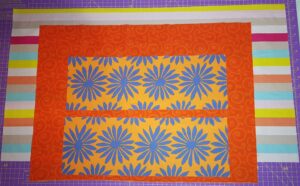
With this in mind, here is an idea for an easy shopping bag to put together, for hanging on your shoulder. The sample one made here, to give an idea of the basic bag pattern, is just put together with 2 layers of fabric and has not been quilted.
It can be made with one main fabric on the outside or with a main and a contrast fabric. You can let your imagination run wild, from making it out of quilting blocks, patchwork, applique, whatever you like.
Requirements:
Outside of Bag:
If using a contrast fabric:
1 piece 18” x 24.5” (Main Colour Cotton Fabric)
2 pieces 18” x 6.25” (Contrast Colour Cotton Fabric)
Or If using just one fabric for the outside only
1 piece 18” x 36” (Main Colour Cotton Fabric – no contrast)
Cotton Lining Fabric:
1 piece 18” x 32” (Lining fabric)
Other Bits:
Webbing – 2 x 33″ – 38” lengths for handles (depending on your height).
Matching Cotton in both Top and Bobbin threads
Fabric Scissors
Rotary Cutter and Mat
6” x 24” Quilters Ruler (a 6” x 12” Quilters Ruler is also useful if you have one).
Soluble Marker Pen
Pins
Iron and Board
Quarter Inch Foot For Sewing Machine
Standard Foot For Sewing Machine
Instructions
Cut out all the fabric pieces according to size. You might like to wait until the time you will apply the webbing, to see the actual length you want to suit your height before cutting.
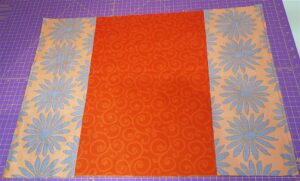
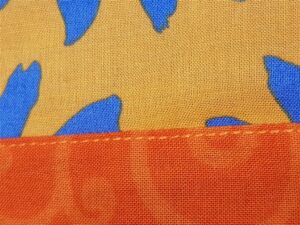
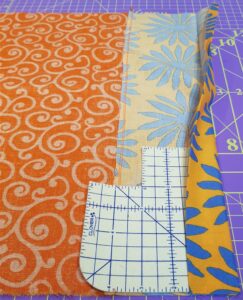
If using a contrasting fabric on the bag, lay the main fabric out and pin the two contrasting fabrics (right sides together) one at each end, ready for sewing together using a quarter inch seam.
When sewn, iron the seams in the direction of the main fabric and then stitch 1/8th Inch onto the main fabric as an edge stitch, to hold the seam down which will prevent it from moving.
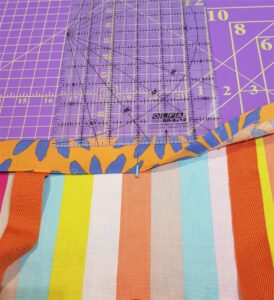
For both ends of this piece (whether you are using just one fabric or have included the contrast fabric), you will now iron both top ends over by ½ inch.
Then you will fold over these again by 1.5 inches and iron along this new edge. This is to create a seam that will hold both the lining fabric and webbing ends.
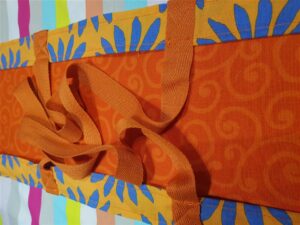
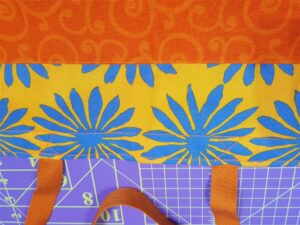
At each end, fold the fabric in half width ways to find the centre points and put pins in the centre mark to enable you to measure where the webbing is to go.
Lay this fabric flat, right side down and lay the lining fabric on top (so that the wrong sides are together). The lining fabric should go up to the final crease line that you created when you ironed it at 1.5 inches (at both ends).
Place a 6” Quilters Ruler, so that the pin at the centre point is on the 3” mark. You then insert the webbing up to the fold line (on top of the lining fabric) either side of where the ruler ends, so that they start 3 inches away from the centre mark.
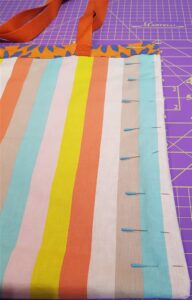
Place the 1.5” hem over the top of both the lining and the webbing, lift the webbing up so it lies on top of the hem and pin across both ends, holding everything in place, whilst you sew down both sides of the hem at ¼” to secure the lining and the webbing ends. In the images you will see I have stitched an X across where the webbing sits, and you can of course stitch a full ‘X Box’ to secure, but the bag will be strong enough with just the two rows of ¼” seam if you don’t wish to attempt this. (Repeat on other side).
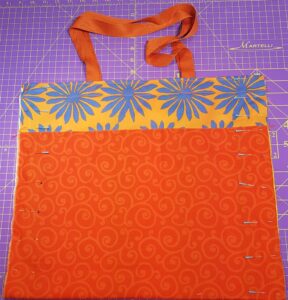
The bag can then be sewn together, and the method I have used is to make a ‘French Seam.’
Lay the bag with wrong sides together, and pin down either side ensuring that the tops meet exactly (and if using contrasting fabrics that the joins match either side when pinned). Sew down both sides at ¼”.
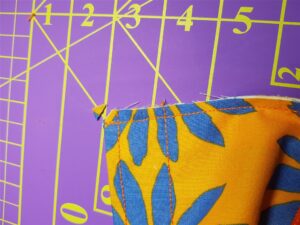
Cut the top corner from the bag being careful not to cut through any stitches. (This corner is only a few millimetres in size, but will help the French seam to look at little neater from the top when completed).
Turn the bag wrong side out and push the points of the corners out from inside and lay the bag flat on the work surface. Pin down both sides and sew 5/8ths of an inch down each side. This creates your French Seam.
Your bag is made! If you feel adventurous you can now add ‘Boxed Corners’ to the bottom which will help the bag to have more shape.
Boxed Corners
Here, we will box the corners using a French Seam.
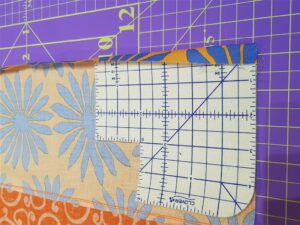
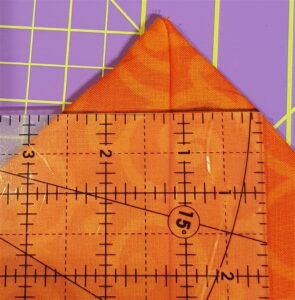
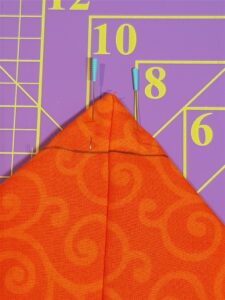
Keeping the bag with the right side out, turn one of the side corners to a point with the seam running through the centre as in the image. (In the attached image the centre line should have been down the 1.25” mark and is just off but you get the idea).
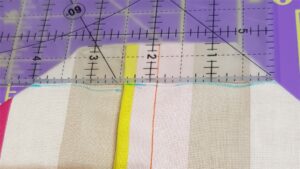
When you place your Quilters Ruler across the corner, you want each side to touch the 0 mark and the 2.5” mark, when it is lined up diagonally this way, draw a line with a soluble marker and put 2 pins in to hold it in place. Sew across this line.
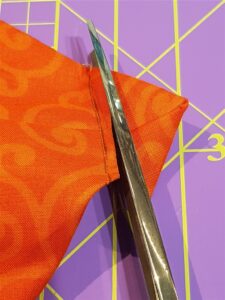
Using scissors, cut the corner off ¼” from the newly sewn line (both sides) and then turn your bag inside out.
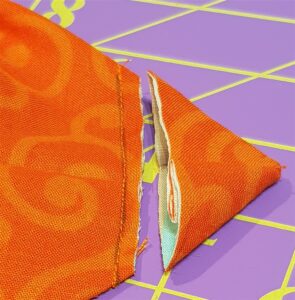
To create the French Seam, repeat the process on the lining side, with the Quilters Ruler, only this time, the distance to draw is 4” so the previous stitched line should be around the 2” mark when laid across diagonally. When you have drawn the line, you need to pin it with 3 to 4 pins, and sew down the line. Your French Seam is complete. (Repeat this process for the other corner). You now have 2 boxed corners.
Turn your bag to the right side out, and why not make yourself a cuppa and sit down to admire your masterpiece!
We use cookies on our website to give you the most relevant experience by remembering your preferences and repeat visits. By clicking “Accept”, you consent to the use of ALL the cookies.
This website uses cookies to improve your experience while you navigate through the website. Out of these cookies, the cookies that are categorized as necessary are stored on your browser as they are essential for the working of basic functionalities of the website. We also use third-party cookies that help us analyze and understand how you use this website. These cookies will be stored in your browser only with your consent. You also have the option to opt-out of these cookies. But opting out of some of these cookies may have an effect on your browsing experience.
Necessary cookies are absolutely essential for the website to function properly. This category only includes cookies that ensures basic functionalities and security features of the website. These cookies do not store any personal information.
Any cookies that may not be particularly necessary for the website to function and is used specifically to collect user personal data via analytics, ads, other embedded contents are termed as non-necessary cookies. It is mandatory to procure user consent prior to running these cookies on your website.