Here are three types of drawstring bag for inspiration as something to make for our future exhibition sales/raffle tables. The first came from an idea when I received a zipped pleated bag from my mother-in-law which I thought would look lovely as a drawstring bag too. There is a much easier version and also a hand-made version, so hopefully something for everyone to try.
Requirements:
Outside of Pleated Bag (using 2 fat quarters)
Main fabric 10 pieces of 7” x 2 ¼ “
Contract fabric 8 pieces of 7” x 2 1/4 “
Contrast Band 2 pieces 3.5” x 9 ½ “ (Don’t cut until ready to ensure it is the same size)
Braid Approximately 2 x 9 ½ “ (But don’t cut until ready to apply)
Cords (if using fabric) 2 pieces 1 ½ “ x 20 ½ “ (or if using cord 2 x 20 ½”)
Lining Fabric (per bag)
2 pieces 9 ¾” x 10”
Plain Green Drawstring Bag (Using 2 Fat Quarters)
Main Fabric 2 pieces of 10” x 7 ½”
Contract Fabric 2 pieces of 10” x 3 ½” (Don’t cut this piece, until you have prepared your main fabric to ensure same size)
Strap 2 pieces 1 ½” x 20 ½” fabric (or if using cord 2 x 20 ½ “)
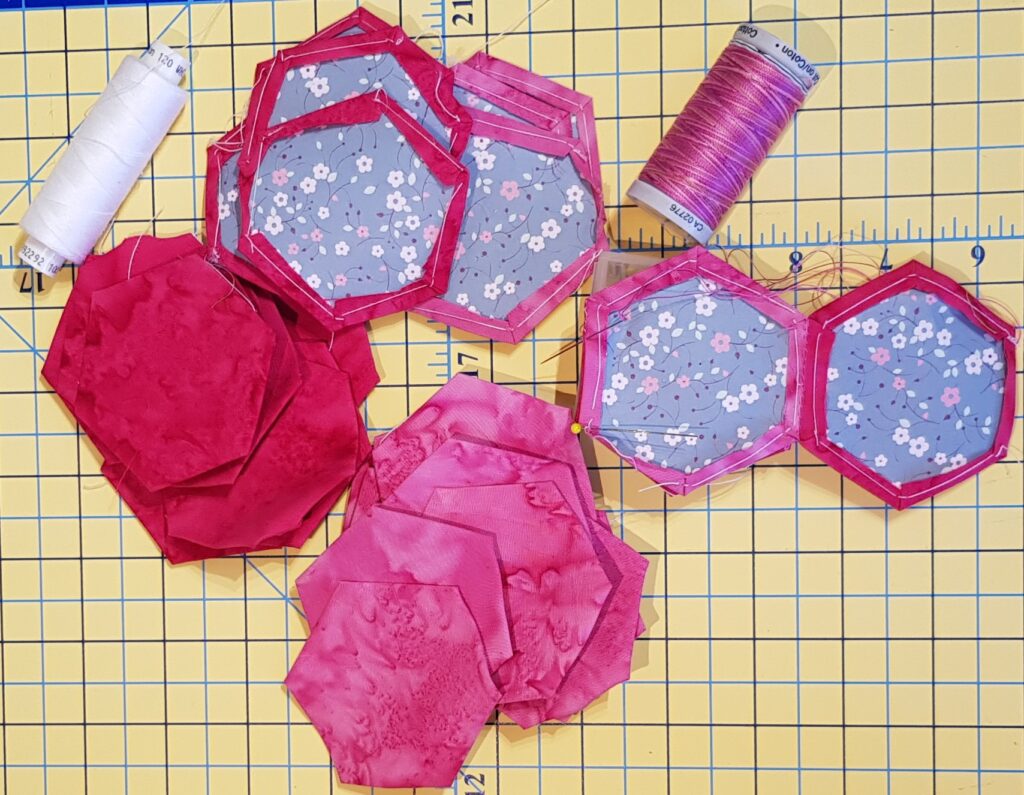
Hand Sewn Hexagon Paper Pieced Drawstring Bag
3 “ hexagon paper template. For the pattern I achieved, I used:
Dark Fabric – cut 26 Hexagons (Completed size 2 ½” when sewn)
Strap 2 pieces 1 ½” x 20 ½” fabric (join pieces to get the length as required)
Embroidery Floss for quilting & 2 x 10″ squares of Cotton Wadding
Other Bits
Matching cotton in both top and bobbin threads
Fabric Scissors
Rotary Cutter and Mat
6″ x 12″ Quilters Ruler
Soluble Marker Pen
Pins
Iron & Board
Quarter Inch Foot For Sewing Machine
Bodkin or safety pin for pulling your cord through
Sewing Needles, if hand sewing
Instructions
These instructions are for the pleated bag, but the green plain bag and hand-sewn hexagon bag, can be made in the same way when your fabric is cut to size.
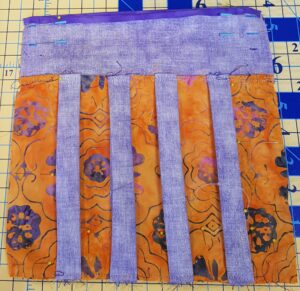
Join alternate strips as shown, using 1/4” seam allowance to create both bottom halves of the bag (right sides together).
Mark the centre of the contrast fabric top and bottom, and carefully pin the main fabric into the centre mark from each side so that you create a pleat.
Sew these pleats down using an 1/8” seam allowance. Then edge stitch 1/8” along the main fabric along the pleated sides. (You don’t have to do this, I just found it helped the fabric to sit better).
Cut your contrast top fabric to match the width of your main fabric and also cut your braiding to match. Apply braiding to your contrast fabric 2” from the top.
With right sides together, join the contrast fabric to the main fabric (front and back) using a ¼” seam.
Iron this piece with the seam pressed towards the contrast fabric and edge stitch 1/8” along to hold this seam down.
Iron the top edges of front and lining fabrics over at ¼”.
Pin your main pieces together down both sides and the bottom, but leave a gap for the drawstring at the top on both sides. You can see I have marked and pinned the first pin at the bottom of the folded edge (which would be at ½” overall from the top edge), and the second pin has been put ¾” after the first pin (which would be 1 ¼” from the overall top edge).
Sew ¼” seam down both sides and bottom of the main pieces, but don’t sew across where you have placed these 2 pins, so that a gap is left for the drawstring.
2″ width line
Pin to sew
Leave 1/4″
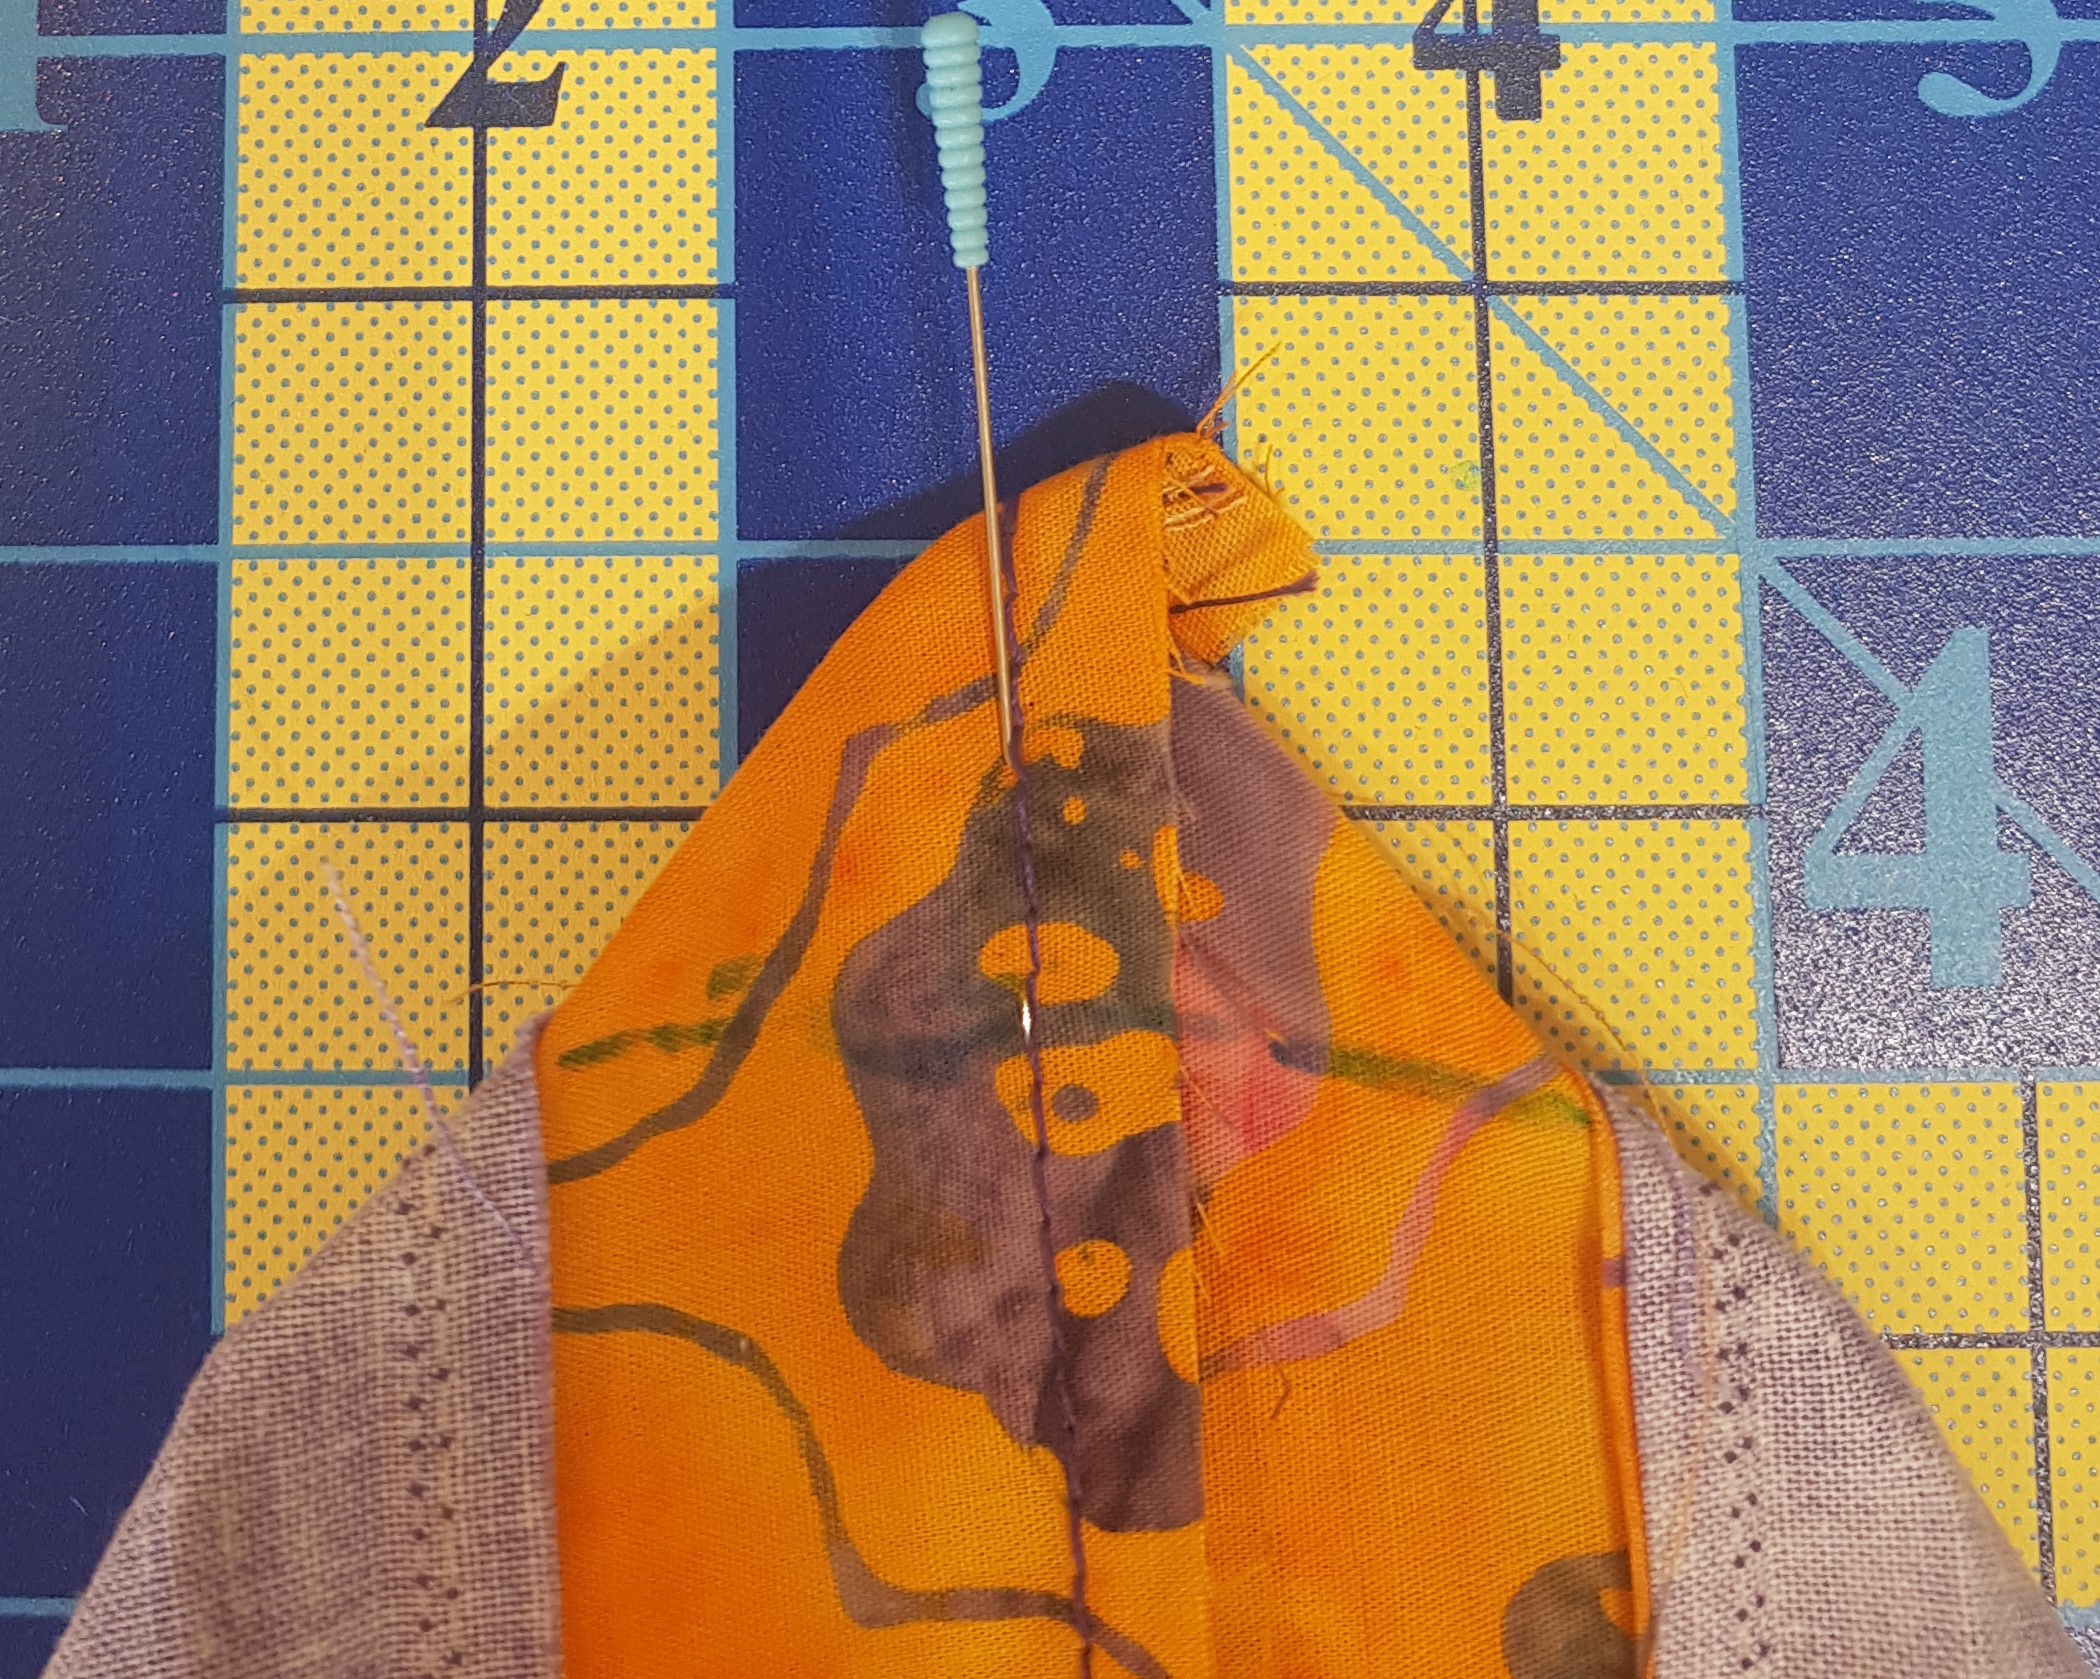
If you wish to add a boxed corner you will need to turn your bag inside out and turn one of the bottom corners to a point with the seam running through the centre as in image. Place your Quilters Ruler across the corner so that one side touches the ‘0’ mark and the other side touches 2 inches (I used the wrong edge of the ruler in my photo, but you can see it covers 2 inches). The centre sewing line should be on the 1st inch mark. Draw a line with a soluble marker.
Put a pin in to hold the seams together and sew across the line you have just marked.
Cut the fabric away, leaving just ¼” beyond the seamline. Repeat this procedure for the other side of your main bag.
Pin your lining pieces down both sides and bottom and sew together, without leaving any gaps, as these are not required for the drawstring.
Repeat the boxed corners if you are putting them in.
Lining
Lining Boxed Corners
Trim Corners
Pin Lining to Main Fabric
1/8th” Edge Stitch
Open your seams at the top of your main bag and lining, and carefully cut the corner off to reduce bulk.
Turn your lining inside out, and place inside the main bag with wrong sides together, and pin ready for sewing.
I edge stitched using a 1/8” seam allowance all the way around the top edge.
Remembering where your gaps are by putting 2 pins in place to remind you.
Sew in line with the top and bottom of this gap, so create a channel for the drawstring by sewing through both the top and lining fabric at the same time.
Channel Markers
Stitch 2 Rows
Strap
Fold in half
Fold edges to middle
Fold in half again
To make your fabric strap you will need to fold your fabric lengths in half lengthways and iron so that you can see where the centre is. You would then press each side towards this centre line, and then iron in half again so that all the seams are tucked inside.
Alternatively, if you have a ¾” bias tape maker
You can feed the fabric through on your ironing board
Then iron this in half, so that all the seams are tucked in.
3/4″ Bias Tape Maker
Fabric Going Through
Folded in half
Bodkin/Safety Pin
Straps
Sew Ends Together
Machine sew down both sides of each strap (or hand sew), leaving at least 3 inches unsewn at each end so that we can join the ends together when we have threaded them through.
Using a bodkin or a safety pin, pull the cord or fabric through the channel back to the same starting place and then do the same with the other strap through the other hole.
Open the straps up and pin so that you can sew ¼” seam to join the ends together and fold back over.
You can pull a lot of the cord through (squeezing the bag tight), so that you can get the remaining 6 inches of strap through the machine to complete the 2 rows of top stitching.
Here is how your bag and straps should look when completed.
If you have sewn one of the other styles of bag, here are a few additional photographs of the stages I went through:
We use cookies on our website to give you the most relevant experience by remembering your preferences and repeat visits. By clicking “Accept”, you consent to the use of ALL the cookies.
This website uses cookies to improve your experience while you navigate through the website. Out of these cookies, the cookies that are categorized as necessary are stored on your browser as they are essential for the working of basic functionalities of the website. We also use third-party cookies that help us analyze and understand how you use this website. These cookies will be stored in your browser only with your consent. You also have the option to opt-out of these cookies. But opting out of some of these cookies may have an effect on your browsing experience.
Necessary cookies are absolutely essential for the website to function properly. This category only includes cookies that ensures basic functionalities and security features of the website. These cookies do not store any personal information.
Any cookies that may not be particularly necessary for the website to function and is used specifically to collect user personal data via analytics, ads, other embedded contents are termed as non-necessary cookies. It is mandatory to procure user consent prior to running these cookies on your website.